


Since I started on my watchmaking journey, it has been my grand ambition to design and hand-make my own British watch.
One of the first books I purchased after my interest had been piqued was George Daniels’ Watchmaking. This is a fairly exhaustive description of how to make every part of a watch by hand. I read it cover to cover 3 times in a month after it arrived, and despite at the time it being difficult to understand the instructions; it did not temper my enthusiasm to put into practice these ancient skills he had rediscovered.

When people think of watchmaking, their first thoughts often turn to Switzerland, so I was hugely motivated by discovering that despite all the marketing hype, the technology behind the modern watch is almost entirely British. The British watchmaking technologies, tools and techniques from the 18th, 19th and 20th centuries are still in use today.
Unfortunately the British watch industry is currently a shell of its former glory. If I wanted a British watch of my own then I had only one practical option – to make it myself.
So there was my goal; to build my own watch, hand-making as much of it as I could, making it a truly British watch.
In the end I can say that my watch is currently one third hand-made from scratch, one third customised and one third unaltered.
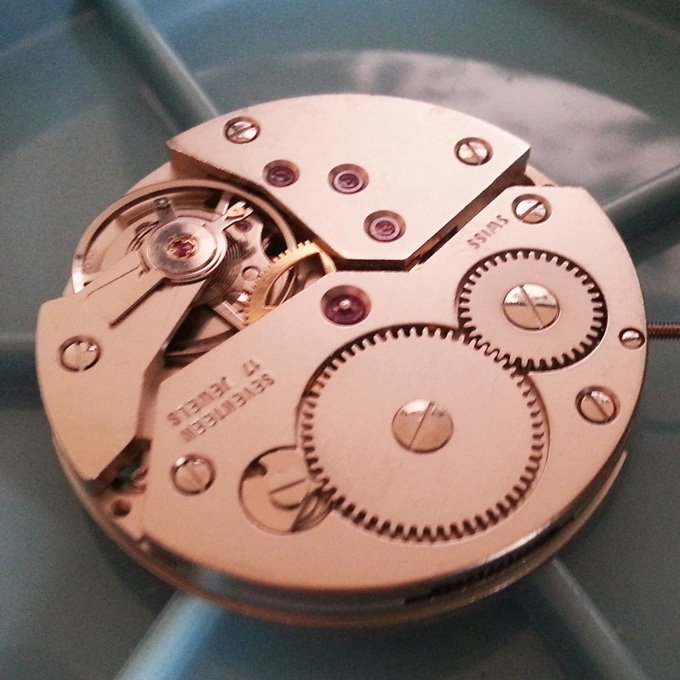
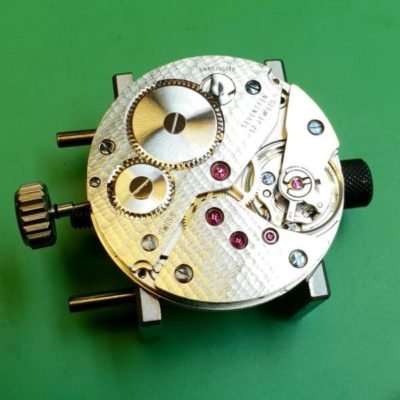
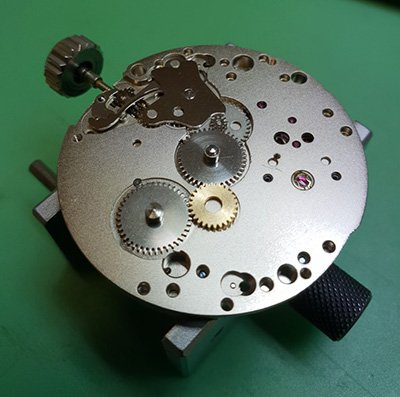
It is based on a stock ETA 6498 movement but set out like a regulator, with the hour hand at the top and the second hand at the bottom. The 6498 is a large pocket watch sized movement, it is manual wind and has the second hand off centre at the 6 o’clock position. So to convert it to a regulator layout I moved the hour hand to the new position at 12.
Designing My Own British Watch
I started out with grand plans to make a more complex watch with retrograde hour and minute hands and to work towards making every part of the watch by hand. Retrograde is where the hands move along an arc and then snap back to the beginning when they reach the end of the arc. You can read about the progress of my designs here.
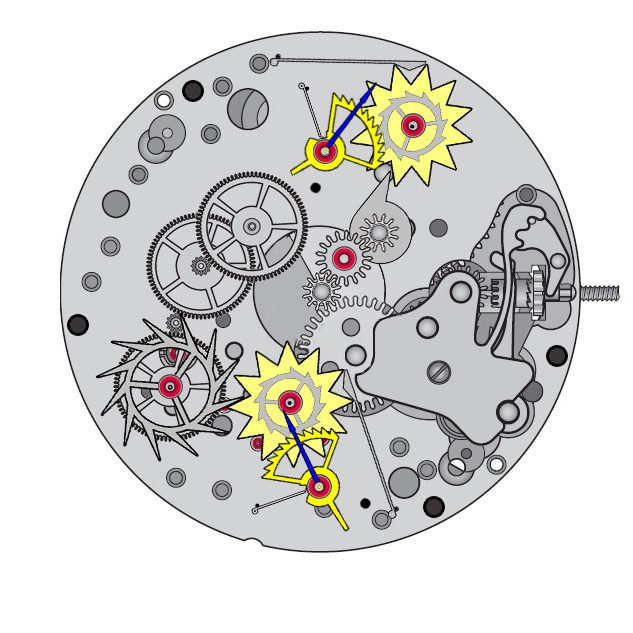
I designed a layout of how I could achieve that working with the ETA 6498 movement. I realised that I would need an extra plate over the top of the additional wheels to hold them in place. The retrograde complication is adapted from a drawing in George Daniels’ book Watchmaking.
However, my ambition was tempered by the realisation of the time required. In the end I reduced the complexity of the watch to achieve the main goal – producing my first branded watch.

Making My Own British Watch
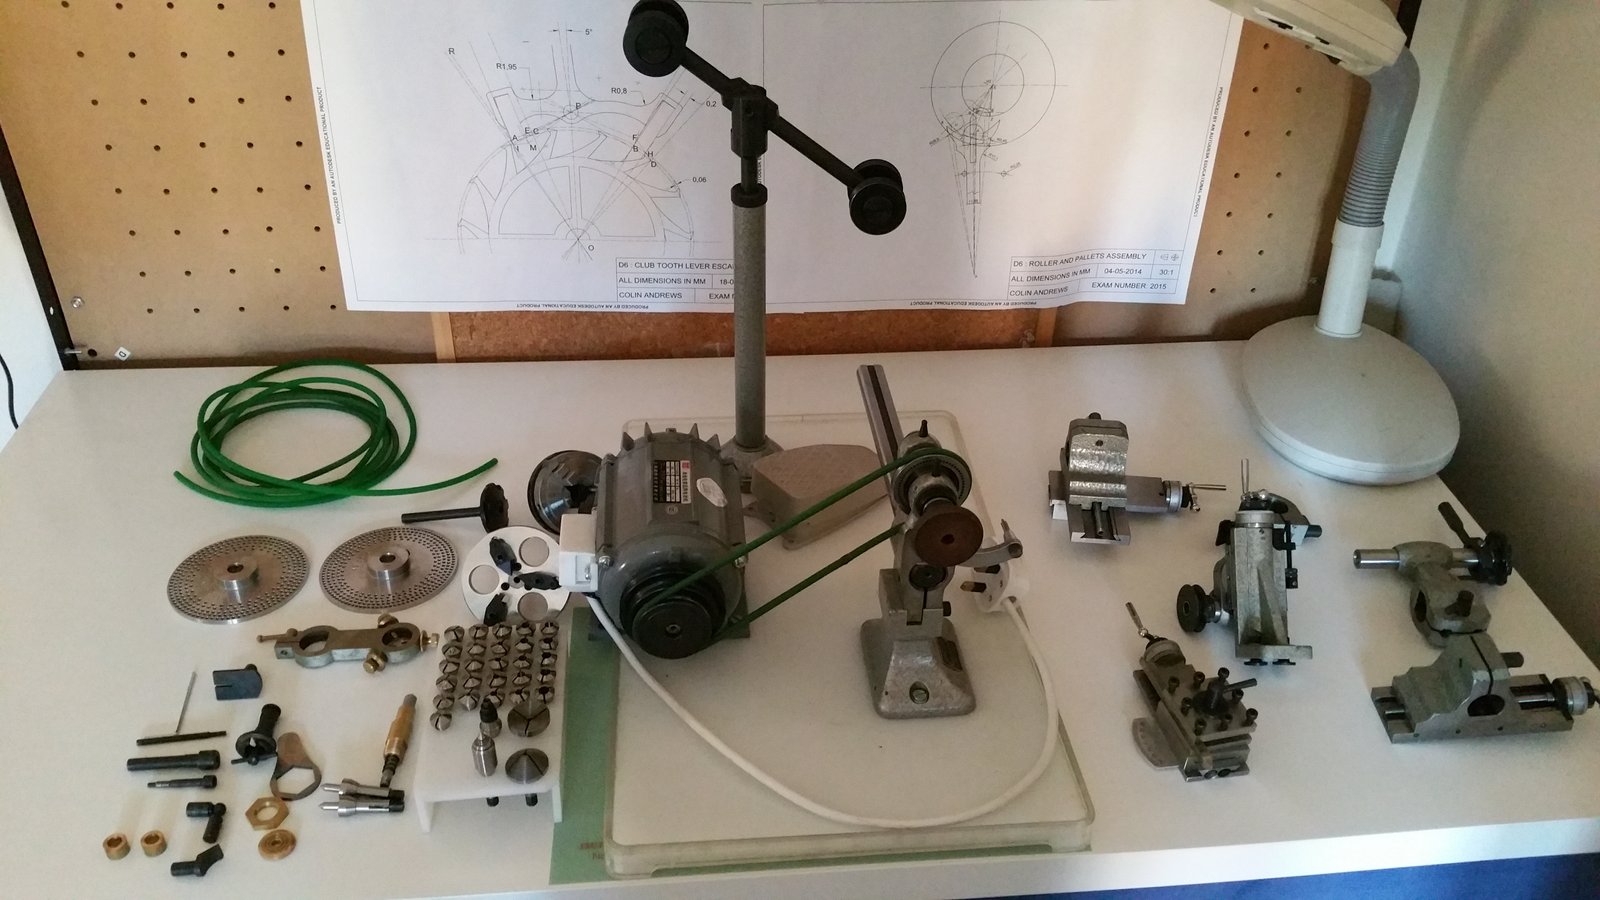
The lathe I used for most of the work in making my watch (above). It was a Chinese-made Sincere brand lathe. It had most of the additions that I needed such as; a milling attachment, dividing head, cross slides and a mandrel.
I started by making the crown wheel, ratchet wheel and click; as well as making the screws for them.
These three elements alone had taken me close to 100 hours to design, set up, manufacture and finish. The finishing was particularly time consuming as I had set myself high standards; I went for a flat surface and high polish on the screws and click, and for the crown and ratchet wheels a sunburst effect with beveled and polished teeth.
As I was working full-time I had to find the time in the evenings and weekends to work on my watch. So I refined my ambition by deciding to not make the train wheels. Also rather than make each of the movement screws from scratch, I instead tempered the existing screws to a blue colour.

I had hand-made my wedding rings around this time and learned how to achieve a satisfying hammered finish. So I applied this to my barrel and train bridges as well as the balance cock.
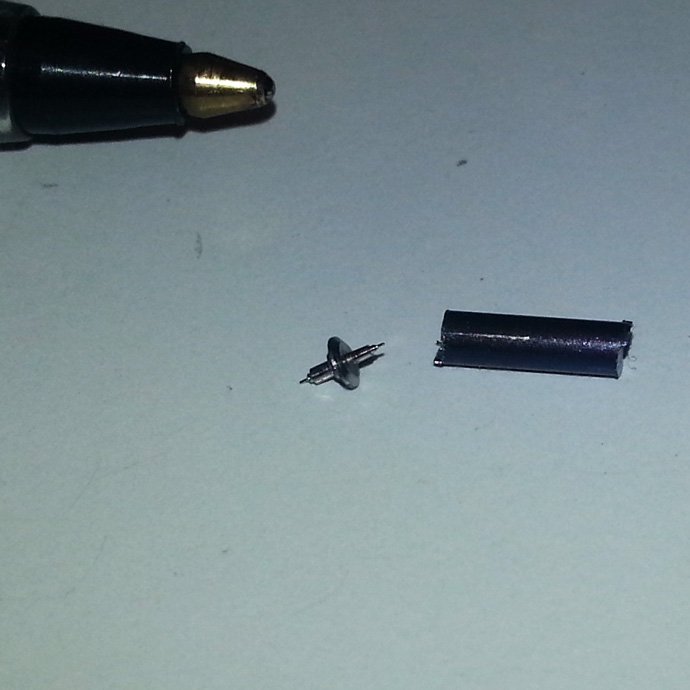
The next step was to adjust the position of the hour hand; from the centre up towards the 12 o’clock position. This could be achieved by adding in another hour wheel and an intermediate wheel; to ensure the hand turned in the correct direction. As the minute hand would now not sit on the same axis as the hour hand, for the adjusted hour wheel I drilled out the existing hollow post and replaced it with a solid post. The brass intermediate wheel I made by hand using a dividing head and wheel cutters.
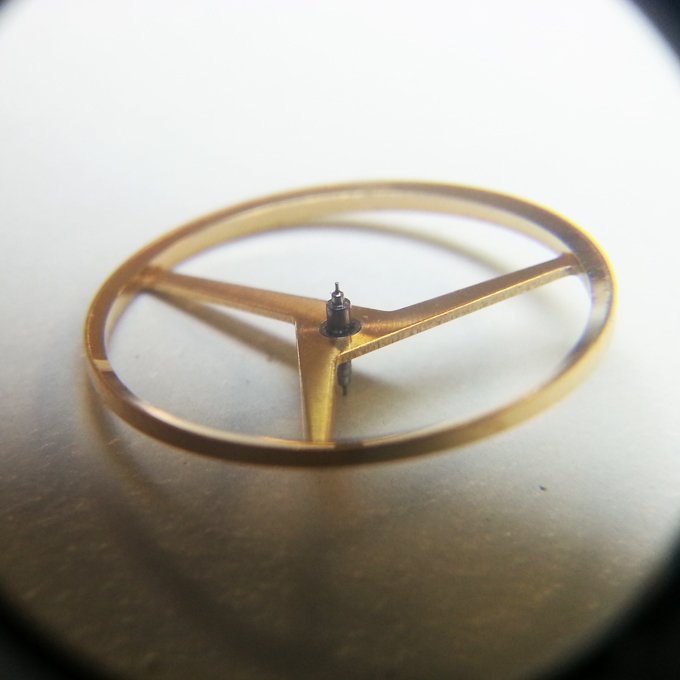
To position the new hour and intermediate wheels I milled out two donut shapes on the existing main plate. This created the recess for the wheels to sit in and posts for the wheel to rotate on (below).
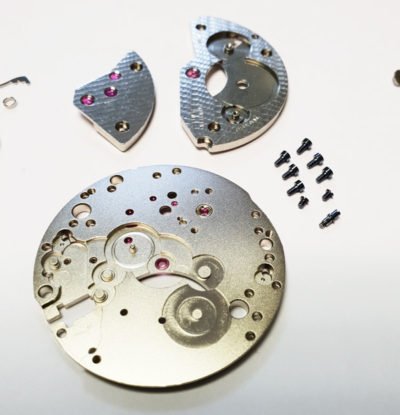
The plate which held these wheels on was a solid disc with the corresponding holes drilled in for the hands, the dial feet and the 3 screws I would use to secure the plate to the main plate of the watch (below). I also added in an observation hole for the keyless work. As I had created additional thickness from the new wheels I ensured that there was enough clearance by milling a space for them on the reverse side. I then finished off the plate by decorating it with Genève stripes. This was achieved by running a milling drill bit at a very slight off-vertical angle across the surface. With the cross-slides from my lathe this was a quick process once it was set up.

The winding stem was made from a piece of blue steel and cut with a tungsten graver on a hand powered lathe and turned between centres. I was fortunate in that I had made around a dozen stems for this calibre during my training at the British School of Watchmaking (BSoW) for the 6498 movement. You can learn how to make a winding stem here.
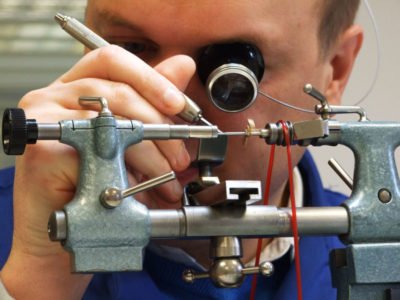
I had also made several balance staffs for the movement at the BSoW, although these were mostly practice pieces and so I did not feel would be sufficiently accurate to use in the watch and so I decided to make a new balance staff. You can learn how to make a balance staff here.
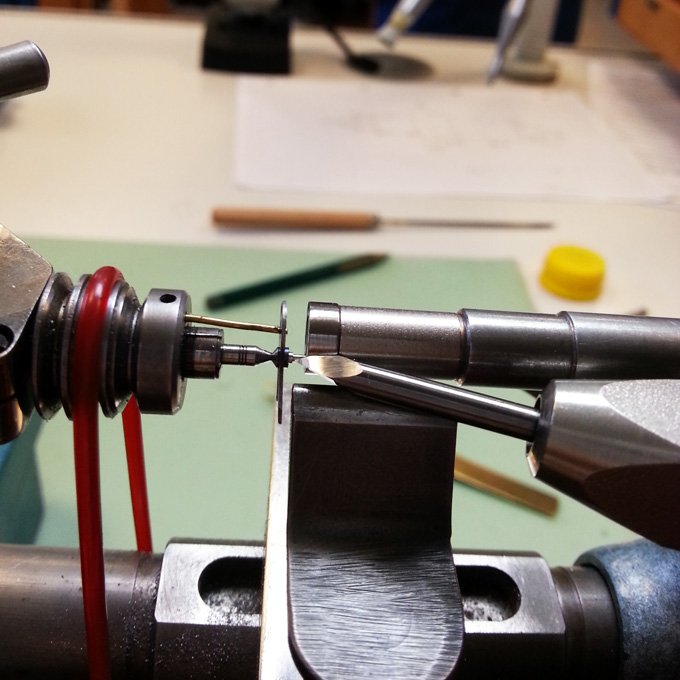
Making a balance staff is a very delicate and highly skilled process, and one that is viewed as the pinnacle of watchmaking; as you need to be accurate in parts to within 0.01mm along 16 measurements. If 15 measurements are correct but one is wrong, then you need to start again and so it is also a process in the art of fortitude and patience.
Once you are practiced each staff takes around 4-6 hours to make, and for this watch I made 6 in total and chose the one I was the most happy with.
Any errors in the balance staff will have a significant effect on the timing of the watch – making it gain or lose time. My staff performed excellently, with no beat error, positional error and, after additional fine tuning, a timing delta of zero.
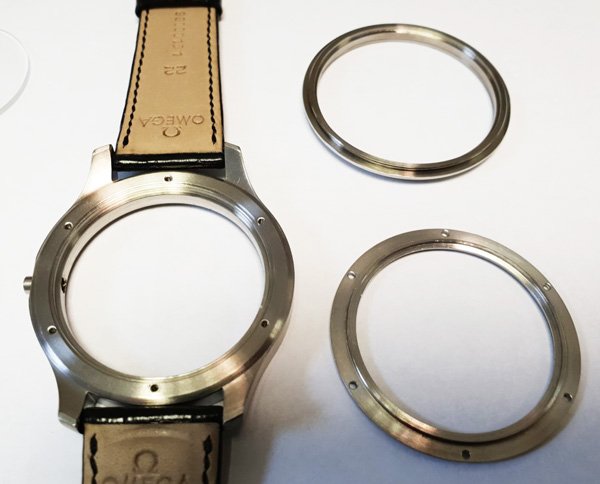
The final part to make was the case. This was milled out into a rough shape and then finished off using a grinding wheel on a polishing lathe. It is a 3-part case with a snap-on bezel and a screwed down display caseback.
I had measured the case with some existing seals in mind and they fitted perfectly. With the separate parts all fitted together and sealed, the watch has passed a pressure test at 50M (5BAR), making it suitable for swimming.

I finished the case by giving the bezel a high polish and every other surface a grained finish; either straight or circular. It is fitted with a black 22mm alligator strap from Omega.
I have painted the hands red, white and blue in line with the Great British Watch Company branding.

With the final silver dial made and fitted, the watch really comes to life.
The Next Steps
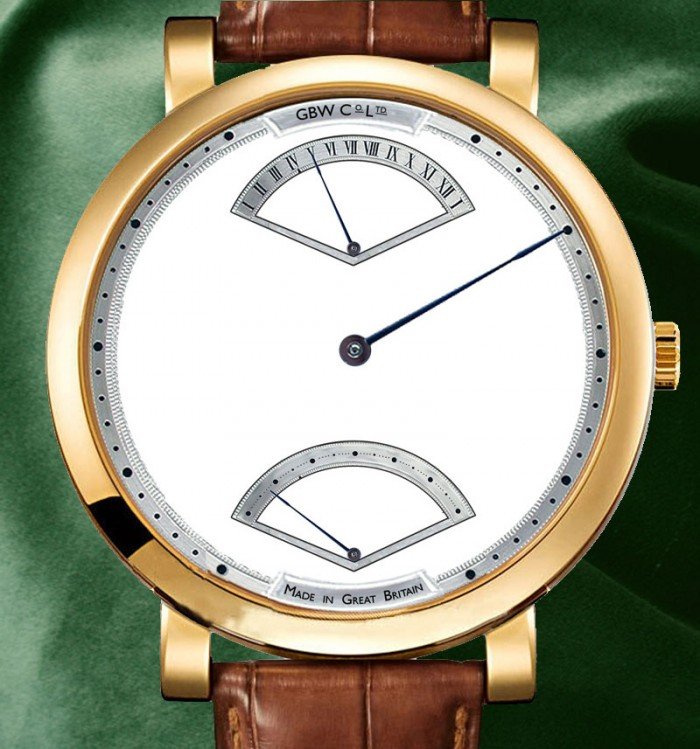
I have designed a dial that I intend to make myself (below). I would also want to remake the hands entirely.
Then internally I would remake the barrel and train bridges into a three quarter plate, which I would hand-engrave. I would also want to hand-engrave the front plate as well; I’ve always liked the idea of having something poignant hidden beneath the dial – that only the wearer is aware of.
Conclusion
Altogether the watch has taken around 500 hours of manufacturing to get to this stage. In addition to that there is at least 500 hours of researching, designing and thinking. Add on top of that another 500 hours of time setting equipment up.
After 7 years, I can say that overall I am very pleased with the result. It is very satisfying to have my very own British watch finished.
The experience has inspired me to continue on my personal journey within watchmaking. My career is flourishing and I am able to use my position both at work and online to help inspire some of tomorrow’s watchmakers to follow along the same path.


Andrew Wright
6 May, 2019 at 10:13 pm
Fantastic Colin, what an achievement!
I’m very happy with the work you carried out for me, and will be using you for all future work.
BR.
Andrew
Colin
7 May, 2019 at 9:26 pm
Hi Andrew,
Thank you for your kind comment. I hope that you are well.
Colin
Richard
9 March, 2020 at 2:00 pm
Awesome work!
I was thinking about doing the same thing – I love the regulator look.
BUT – I have settled for a date mechanism (stolen from the Unitas 6503). However I am unable to source the double toothed hour wheel for the addition.
(it runs counter clockwise I believe)…
Do you know where I might find a double toothed hour wheel??
I have no idea on teeth count for it, I do have the date wheel it runs with though) – might you be able to make me one?
Let me know your thoughts!
Cheers,
Richard
Colin
18 March, 2020 at 12:42 pm
Hi Richard
Many thanks for your comment!
I’m not familiar with the 6503 movement. Looking at Ranfft (https://www.ranfft.de/cgi-bin/bidfun-db.cgi?12&ranfft&206&2uswk&Unitas_6503) is the “double toothed hour wheel” the date change wheel?
That would need to turn once every 24 hours, whereas the standard hour wheel turns once every 12 hours. So the wheel will need exactly twice the number of teeth. You can in some cases convert a wheel by placing one on top of the other (minus the tube) and setting the 2nd wheel so the teeth are in-between the lower wheel’s teeth – but the wheel’s diameter wouldn’t be big enough.
As you generally do not have enough space on the dial side of a watch to work with wheels and pinions to reduce or increase wheel turning speed, another solution would be to add in two new smaller wheels. The first with, for example, 8 teeth and the 2nd with 16 teeth. You could then take a tube off an hour wheel, mill a post in the top plate and use that in place of the date change wheel – with you needing to add in a pip to knock the date wheel’s teeth. If you use this set-up you would reduce the wheel’s turning speed by half i.e. it would turn every 24 hours.
Unfortunately I will not have the time to make a wheel for you, as I am too busy at the moment building my new watch collection.
As it’s a lot of work, perhaps try some watch forums and see if anyone is able to help you – you might get lucky and find someone with a spare wheel for you.
Cheers
Colin
Robert
23 April, 2020 at 5:09 pm
Hi Colin,
Great work, well done.
I am interested to know what set up you used to make the crown and ratchet wheels, especially cutting the tooth profiles, they look excellent and virtually identical to the originals.
What type of steel was used, was it round stock or flat plate, and what condition was the steel in when the teeth were cut, annealed?
Did you make your own cutters or were you able to source the correct ones from a supplier? PP Thorton?
How did you come up with the correct tooth profile?
What did you use as an indexer? Electronic with stepper motor, or a manual set up?
Did the lathe or vertical mill need any modifications or refinishing to achieve these results? I have read that these lathes need some TLC and lapping to eliminate excessive shake.
Any photo’s of the process of making these wheels you can share?
Thanks,
Robert
Colin
23 April, 2020 at 6:12 pm
Hi Robert,
Thanks for your message.
These were the first wheels that I had ever cut and so I probably didn’t follow the correct process. It certainly wasn’t a commercially viable process as they took me far too long to make, but I am happy with the result.
They were also made more than 5 years ago and so I’ll try and remember how I made them as best as I can.
It was horological blued steel that I used, purchased as a rod. I annealed the steel and then cut the teeth roughly into part of the bar. I think it was along 50mm or so. I afterwards then used my cross slide to cut out the rough thickness of the wheels. This is the wrong way round to how most people make wheels, but it was a bit of trial and error for me.
I was fortunate in that I was able to borrow some teeth cutters from another watchmaker. They were able to provide the correct ones, I’m not sure who they were produced by.
Most of the tooth profile was created on a lathe and then finished off by hand. I didn’t have a wheel topper, and had spent some time while a watchmaking student practising finishing off teeth by hand and so I stuck with this method.
The lathe had a dividing head with it, it’s one of the optional extras, and so I used that as the indexer. It had an electric motor, but I fed the cutters in by hand.
The lathe and milling attachment were good, but you did need to allow for some extra shake. I just ran the motor slowly and fed it very slowly into the bar. I didn’t lap them at all, but the milling attachment certainly felt a lot less sturdy than the main lathe.
I sadly didn’t take any photos while I made the wheels, or while I finished them.
I hope that helps.
Colin
nicholas clark
19 February, 2023 at 2:37 pm
If I supply an empty watch case can you install movement with a new face etc for me ???
Colin
24 February, 2023 at 10:08 am
Hi Nicholas
I am not taking on any extra work at the moment, but any watchmaker will be able to assemble a watch for you if you supply the parts to them.
Colin
Toshinori
26 January, 2024 at 9:31 am
Wow, what an inspiring post! I’m thinking of starting to make my own watch too, as a present for my brother.
It’s great to know this is a long journey, I had no idea where to begin, your advice has given me a clear direction for my first steps, thank you so much!
Colin
12 February, 2024 at 9:12 pm
Thank you Toshinori, I’m glad you found it useful – best of luck with your watch! Colin
Toshinori
1 February, 2024 at 7:45 am
Dear Colin,
After reading your post, I bought the book “George Daniels’ Watchmaking” and started searching for more information about watchmaking.
I noticed in your post that you use a Chinese-made lathe, this has a tolerance of 0.0004 inches (0.01mm). Could you recommend an affordable lathe with similar precision? Additionally, in terms of design, do you use software like Fusion 360, SolidWorks, or AutoCAD?
Noise is a concern for me as I live in an apartment building. Do you have any recommendations for a quieter lathe that wouldn’t disturb my neighbors?
Colin
12 February, 2024 at 9:40 pm
Hi Toshinori,
For a lathe, you can try and find a second hand watchmaker’s lathe if price is a factor. Currently the best new lathes for the price are Michael Chung’s CZ50 (https://www.instagram.com/watchmakerlathe/), they’re around £5,000 and are fantastically stable and precise. The only real noise from a lathe comes from its electric motor, which would be 50-60db – about as loud as a person speaking.
Fusion360 is the easiest CAD software to learn and use, and is the least expensive. Solidworks is the most powerful but I found it really unintuitive and the yearly license is very costly. AutoCAD is somewhere in between.
Toshinori
5 March, 2024 at 2:52 pm
Dear Colin,
Thank you for your answer. I apologize for the late reply. I didn’t receive an email notification about your response in my inbox, so I might have missed something on my end.
The book you recommended is fantastic (I’m still in the process of reading it). I purchased a Fusion 360 course on Udemy to learn how to use the software.
£5,000 is currently outside of my budget, but thanks for the recommendetation, Do you have some recommendations for lathe between £500 and £800?
I truly appreciate you taking the time to answer my previous question and write your blog posts. They have been incredibly helpful!
Regards.
Colin
20 March, 2024 at 10:59 am
Hi Toshinori
For a lower budget lathe, most people will buy a second-hand one. However, buying from places such as eBay is difficult, as you will really need to see the lathe working in person to see if it is worth buying, as many old lathes are badly worn and you won’t be able to do accurate work on them. But, you can get lucky and find a lathe that has been really well looked after and has all the extra parts for within your budget.
Another alternative is to buy from a brand-new lathe from China. A lathe such as this: https://www.alibaba.com/product-detail/China-bench-lathe-WM210V-lathe-machine_60166336674.html is only $620 and although I have no experience of it, it certainly looks like it would be suitable to most work. There are a lot of choices on Alibaba, just search for “micro lathe” or “mini lathe”. Most seem to use a 3 jaw chuck rather than collets, and so if you need to use collets in your work, then make sure to check with them that they fit.
Thanks
Colin
Toshinori
21 March, 2024 at 2:27 am
Dear Collin:
I wanted to say a huge thank you for taking the time to reply to me! I really appreciate your help. This post was the start of my journey, and I’m feeling hopeful about reaching my goal thanks to your advices. I’ll definitely be checking out the lathe you recommended!
Thanks!!