

In preparing to make a screw thread you must first make sure that the cylinder you are going to use is of equal width down its entire length. It should always be 0.01-0.05mm under the thread size. In this example I am turning a 1.2mm thread and so I took the post to between 1.19-1.15mm. You cannot be over this or the die will rip off the excess material taking chunks with it.
My personal preference is to make an additional undercut of about 0.05mm at the shoulder. I find that this helps the visual effect of the screw, and ensures that you can screw the thread in right up the shoulder.

To help the die get started you should make a very slight taper at the end of the cylinder. Once you’re ready you should grease the post, this will help with the cutting and with the removal of swarf.
Then select the right die size.As I’m making a small thread, as it’s for a winding stem, I’ve opted to use a button to hold the die. This is lighter than the usual cranks that you will use and so it is less likely to damage the thread.

The start is usually a little tricky to get going, and if you’re not careful you will just remove material from the tip. This is why at this stage it is usually preferable to have the cylinder slightly too long, so that if you do damage the tip slightly you can always remove it off. Most dies have 2 sides; one with an extra-large chamfer to start and one with smaller chamfer to finish, make sure you start with the larger chamfer facing inwards.
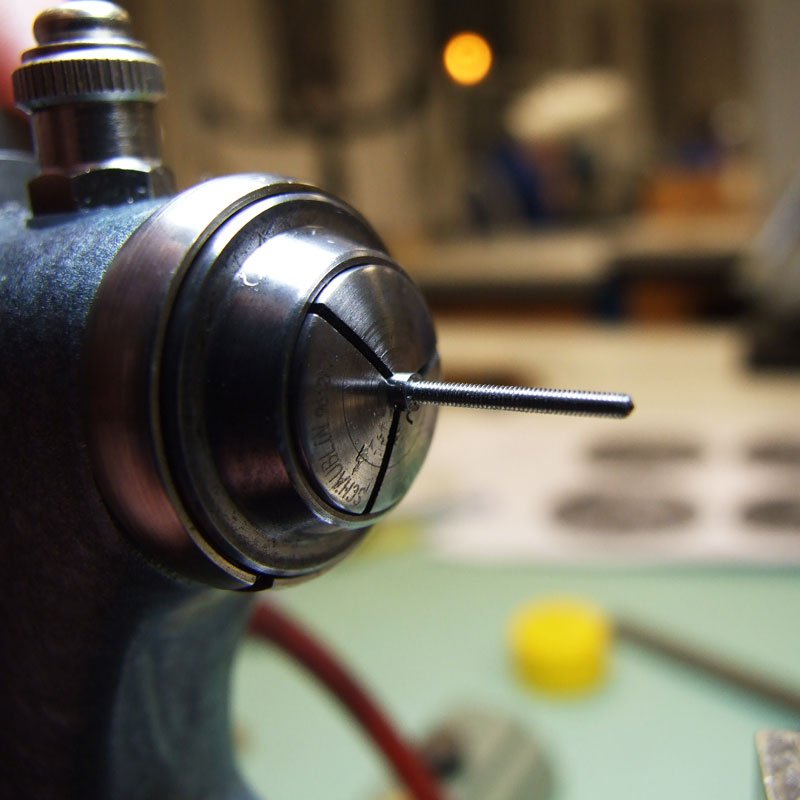
I prefer to hold the die steady and turn the lathe by hand. You could fix the lathe and turn the die, but it is easier to keep it straight if you instead hold the die steady. You should put some force towards the lathe to begin with to make sure the die digs in the right direction and then make a 1/2 turn with the lathe.
It is important that you reverse the lathe at least 1/4 of a turn, as this will ensure that the die’s other teeth will break off the swarf from the part it has just cut. If you don’t do this then the swarf will build up, and rather than break off nicely, it will snap off and take a chunk of your thread with it. You can make a turn of less than 1/2 forward, say 1/3, if you wanted to, and to try to get a better finish. You should never turn it more than 1/2 a turn though.

Once the thread has started, be sure to reverse the die if it is double-sided.
After each half turn and reverse quarter, you should release the die. This will ensure that the die sits straight and that you are not putting too much force on it. You can get yourself easily into a rhythm. 1/2 turn forward, 1/4 turn back, release, 1/2 turn forward, 1/4 turn back, release.
You should check the other side of the cylinder to see the thread emerging. Make sure it looks right and that the cylinder is keeping straight. If you spot a problem early you might be able to fix it. Later on the thread will be unrepairable, particularly if its bent.
At this stage I like to use the end stock of the lathe to support the end of the cylinder in a female centre. This helps ensure that you keep the cylinder straight.

As you approach the shoulder, you will notice that you have a build up of swarf infront of the die. If you do not clear it, you will grind this swarf into the shoulder, and damage it. So you should clean it. Here I’m using some compressed air to blow it away. You could reverse the die and take it off completely, clean it and the thread and continue, but you open yourself to damage it each time you do so.

With the swarf cleared it is easy now to see the shoulder. As soon as you feel the die hit the shoulder stop. It is tempting to make an extra 1/4 of a turn to ensure that the thread is taken all the way up to the shoulder. If you really want to do that then you can make a die plate which has no taper at all. For the most part, there is little point in going so close to the shoulder, as it won’t get used and is just for aesthetics.
If you do turn the die too much, then you will hold the shoulder with the die and pull the cylinder away from it. Even as little as 0.01mm is enough to snap the thread off a small cylinder such as this.
If you don’t snap the thread, then at the very least you will score the shoulder as the face of the die cuts into it.

Once you’ve hit the shoulder, carefully reverse the die. You want to let the die take itself off the screw thread. Just very lightly hold and turn the lathe in the opposite direction. Do not turn the die or force it, or you will likely bend the thread.
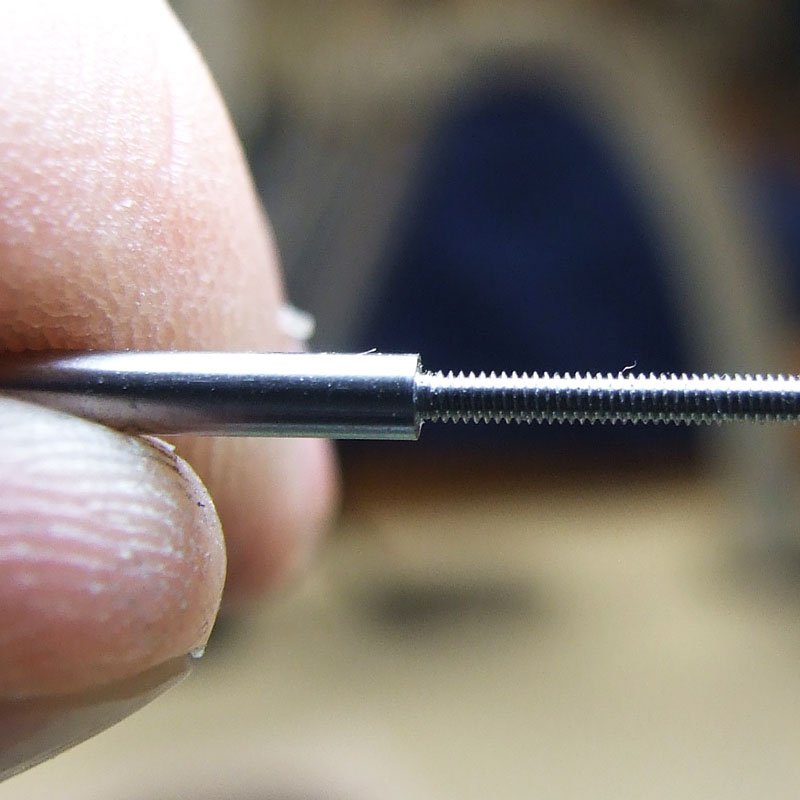
A good thread should have sharp ends and clear troughs. The entrie length of the thread should be usable. If you have correctly cleared the swarf as you’ve worked the thread should be clean. If all the ends are damaged then your cylinder was probably too wide and the die was ripping the ends off. If the thread ends are flat then your cylinder was too thin.
You can see here at the shoulder that I’ve gone about 1/16th of a turn too much. This will leave a characteristic set of three score marks on the shoulder. This case is not too bad, and I was actually able to carefully remove the marks and lap the shoulder smooth again.

Once finished you can file off the end of the thread to ensure that it is to length.

