


Over the next few Sorties, I will provide a short biography of 5 of the 11 pilots that flew Spitfire ML295, the aircraft that The Few watch will be created from. The first pilot we will look at will be Tommy Wheler, who was the first pilot to fly ML295 operationally.
On 2nd June 1944 at 11am Flight Lieutenant Thomas Ross “Tommy” Wheler taxied Spitfire ML295 to the runway at RAF Tangmere airfield and prepared for take off. He was taking part in Ramrod 960, a mission over enemy-held France to disrupt any intervention for the upcoming D-Day invasion, and to attack targets of opportunity. Tommy was taking Spitfire ML295 on its maiden operational flight.
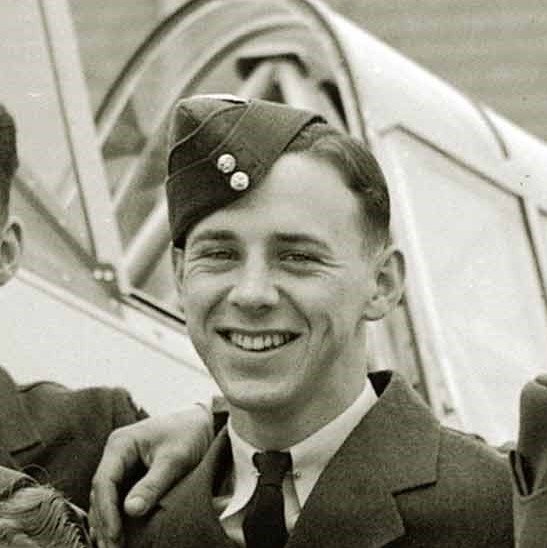
Tommy Wheler
Wheler flew alongside other pilots from 411 Squadron, who I have talked about in the previous Sortie.
Becoming a Pilot
Tommy Wheler was born on 14th February 1921 in Tignall, Georgia, USA, to Canadian parents. In 1927 they decided to return back to Canada with Tommy, and settled in the Toronto area.
After the war had broken out, the Battle of Britain had shown that Britain and her Allies had a severe shortage of skilled pilots. The call had gone out for volunteer pilots to join the war effort. There was a significant push for pilots to train in areas that were expected to be safe from German attack, such as Canada.
So, on 28th January 1941, aged only 19, Tommy enlisted in the Royal Canadian Airforce (RCAF). Tommy told his family “I’ve got to get into this fight”.
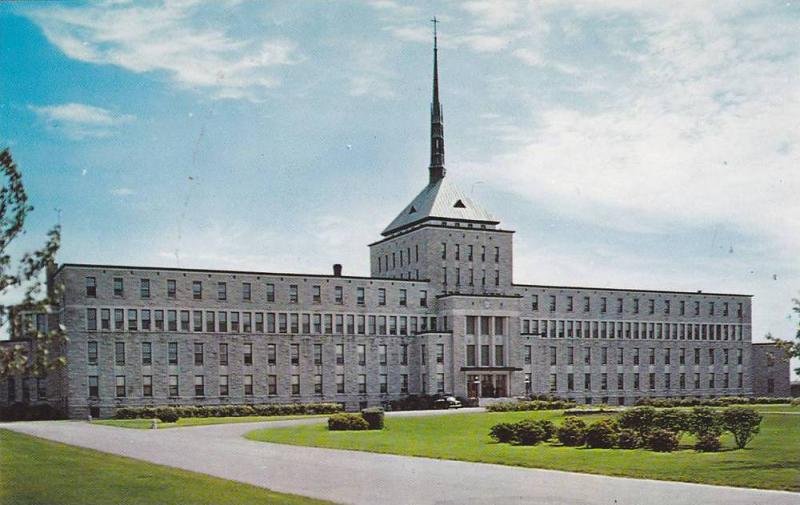
He started his pilot training at the No 3 Initial Training School at Sacred Heart College in Victoriaville, Quebec. He worked his way through the flight schools, clocking up experience in a number of aircraft. His trainers assessed him as an “above average” pilot.
Dreaming of Spitfires
After finishing his pilot training and earning his wings, he was posted over to England. Here, much to Tommy’s disappointment, he was sent to the glider training school in RAF Kidlington in Oxfordshire.
He kept his dream of flying Spitfires in the front of his thoughts and after flying an array of gliders and their tugs for over a year, in January 1943 he was given the news that he was going to be posted to a Spitfire squadron. Tommy was overjoyed and wrote in his logbook “So long gliders. Oh, happy day”.
He took his first flight in a Spitfire a month later, flying a Spitfire Mark 2 – the same that flew during the Battle of Britain. By the time he sat in a Spitfire, Tommy had experience in flying 15 different types of aircraft. This was unusual for a Spitfire pilot and gave Tommy a huge advantage, allowing him to understand the strengths and weaknesses of the Spitfire when compared to other aircraft.
First Mission
After spending some time getting to grips with his new aircraft, on 11th May 1943 he was posted to 411 Squadron of the RCAF, who were based at RAF Redhill in Surrey and equipped with the latest Spitfire Mark 5s.
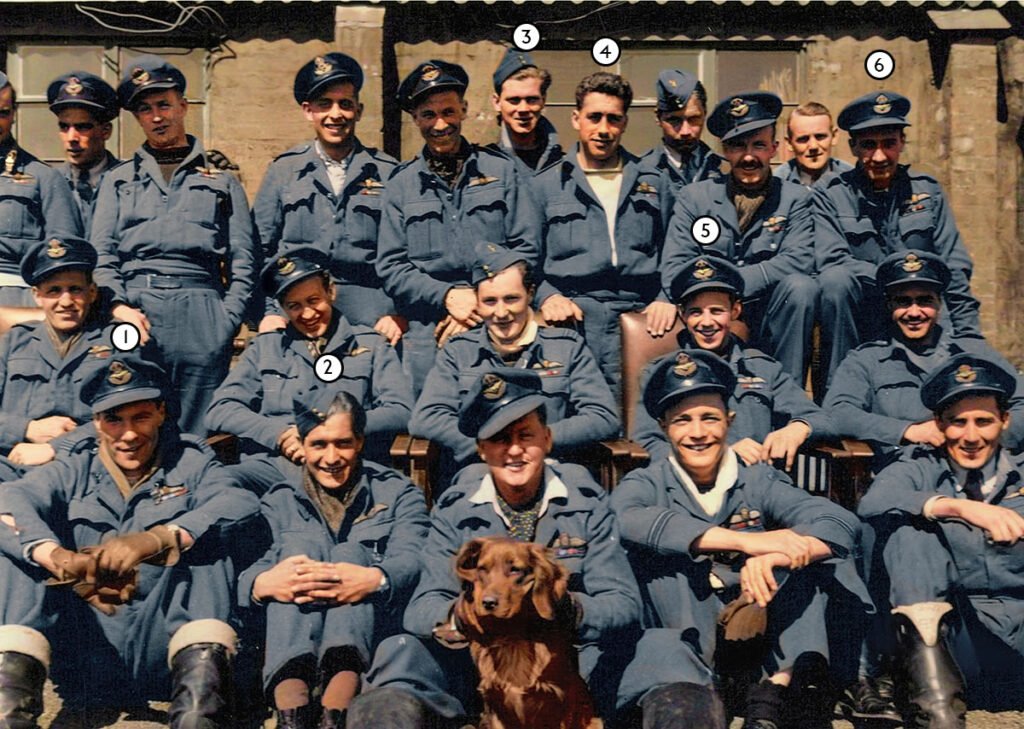
The pilots of 411 Squadron. In this photo are 6 of ML295’s pilots: 1) Harold Nixon, 2) Jim Kerr, 3) Dan LeBlanc, 4) Len Dunn, 5) Tommy Wheler, 6) Hal Kramer
His first mission, on 23rd May 1943, was a convoy patrol over the English Channel. This was a mission to protect the valuable shipping in the Channel that was supplying Britain. The close distance to France meant that by the time a German plane was spotted, any reactionary sorties would arrive too late to be of any help. So instead, patrol missions were flown constantly over the shipping lanes to allow the fighters to immediately respond to any threat.
Much to Tommy’s disappointment however, there were no enemy aircraft spotted during his first mission and he returned safely to base.
Becoming a Spitfire Pilot
In December 1943, Tommy was credited with damaging a German Focke-Wulf 190, with the credit shared with another pilot. In the 8 weeks after D-Day (6th June 1944), Tommy would go on to score two FW190s destroyed, as well as damaging another, bringing his total tally to 2/1.5.
He would later be awarded a DFC (Distinguished Flying Cross) for his flying prowess.
I have found footage taken by Tommy in his Spitfire through the use of his gun camera. This was a small and poor quality camera that was linked with the Spitfire’s weapons – when the guns were fired the camera would record the images. Although the clips are often short and of very low resolution, they still give a fascinating record of the action the Spitfire pilots found themselves in on a day-to-day basis.
The camera has no magnification and so they really were shooting at one another at almost point blank range.

In this footage taken from Tommy’s gun camera, it shows Tommy’s first victory where he was credited with damaging a FW190. This image shows the puff of smoke coming from the enemy aircraft as it is hit by an explosive cannon shell from Tommy. You can view the full clip here, where Tommy’s footage starts at 9:45
https://www.iwm.org.uk/collections/item/object/1060025446
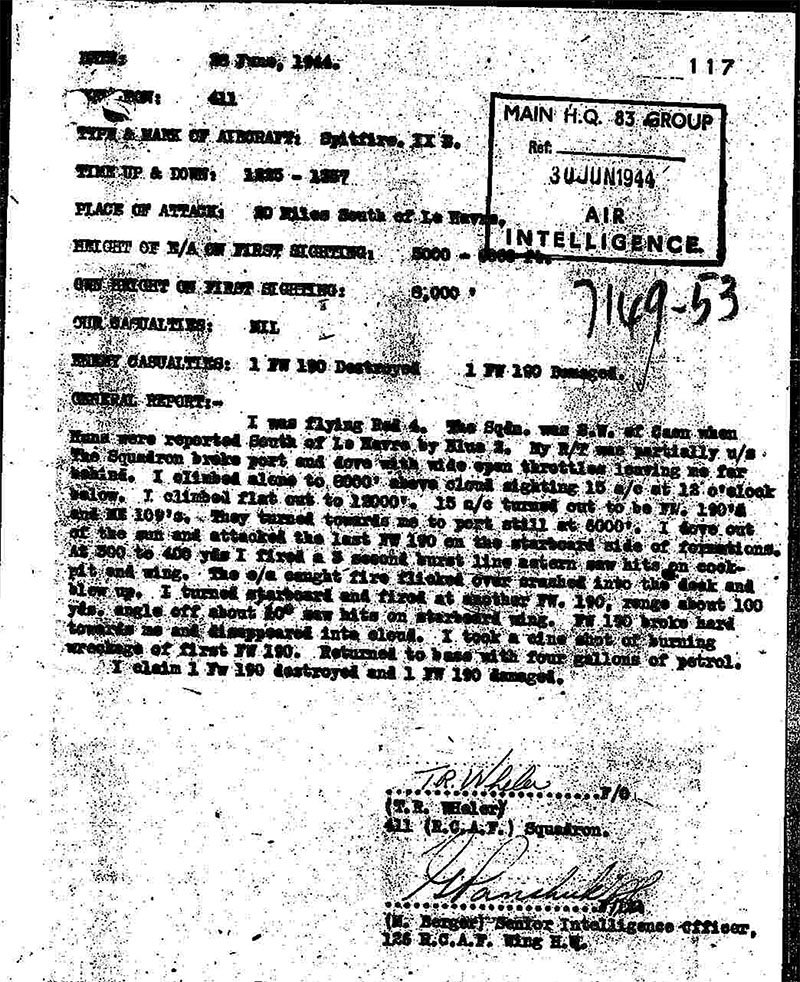
The original report that Tommy filed about his encounter on 26th June 1944. Such reports would be used as evidence alongside eye witness accounts and gun camera footage, to allow an intelligence officer to officially certify claimed victories. With his radio out of action, Tommy finds himself all alone facing 15 German aircraft. It reads:
“I was flying Red 4. The Sqdn. was S.W. of Caen when Huns were reported South of Le Havre by Blue 2. My R/T was partially u/s. The Squadron broke port and dove with wide open throttles leaving me far behind. I climbed alone to 6000′ above cloud sighting 15 a/c at 12 o’clock below. I climbed first out to 12000′. 15 a/c turned out to be FW. 190’s and ME 109’s. They turned towards me to port still at 6000′. I dove out of the sun and attacked the last FW 190 on the starboard side of formations. At 300 to 400 yds I fired a 3 second burst line astern saw hits on cockpit and wing. The e/a caught fire flicked over crashed into the deck and blew up. I turned starboard and fired at another FW. 190, range about 100 yds. angle off about 60° saw hits on starboard wing. FW 190 broke hard towards me and disappeared into cloud. I took cine shot of burning wreckage of first FW 190. Returned to base with four gallons of petrol. I claim 1 FW 190 destroyed and 1 FW 190 damaged.”
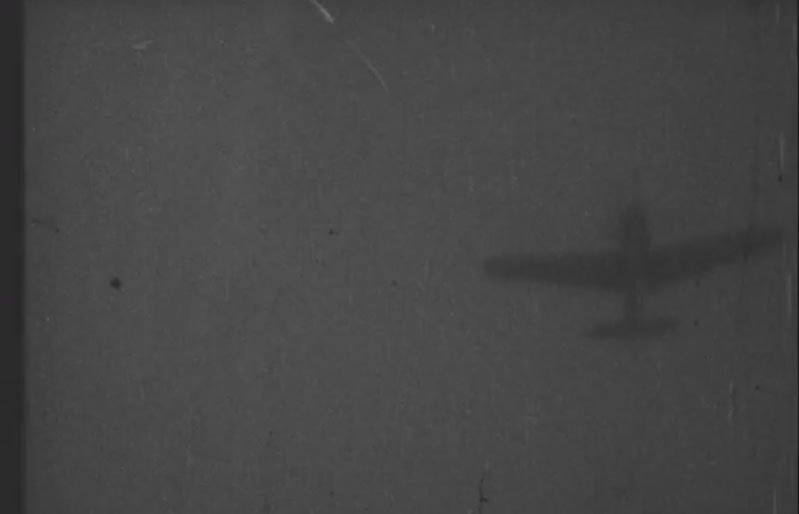
In this footage, the silhouette of a FW190 is clearly visible. This clip shows Tommy’s double victory, where he attacked 15 aircraft alone and was credited with a destroyed FW190 and another damaged. Follow this link to the footage, Tommy’s clip starts at 16:21
https://www.iwm.org.uk/collections/item/object/1060036737
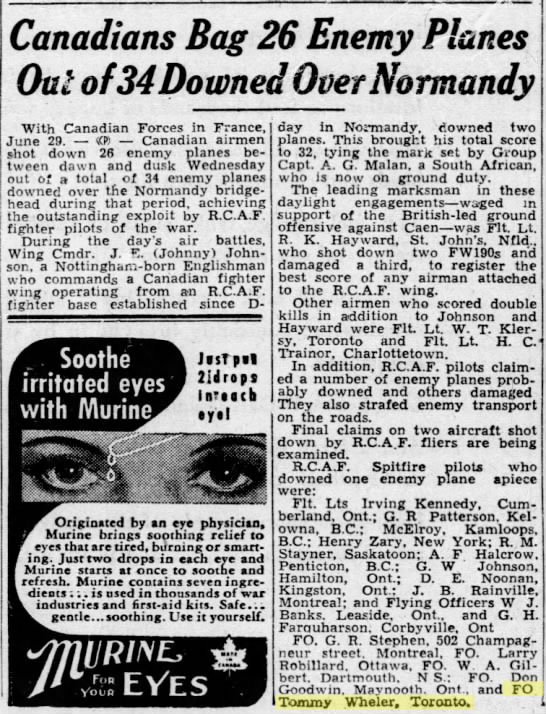
One of Tommy’s victories made the newspapers in June 1944. His name is highlighted at the end of the piece, having destroyed a Focke Wulf 190 and damaged another. Interestingly, almost 80 years later, Murine still make eye drops too!
Relaxing with the Squadron
Tommy continued to fly regularly and proved himself not just an exceptionally capable pilot, but also a real character and a popular member of the Squadron.
It wasn’t all hard work though, and the pilots managed to fill quieter periods with some fun activities. In his notes Tommy mentions that on 12th March 1944 he, along with pilots Wallace and Kramer (another ML295 pilot) practiced their marksmanship with skeet shooting (shooting clay targets with a shotgun). Each of the pilots were fiercely competitive, but in the end Hal Kramer won the competition.
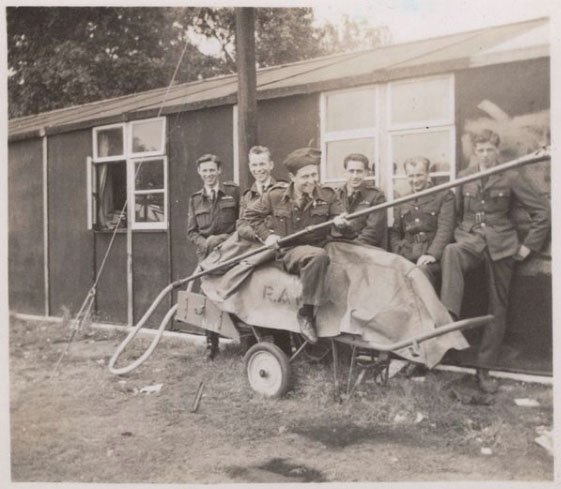
The mood was often jovial at the RAF bases in England, but became much more serious after D-Day when the Squadron had moved to France. Tommy is standing on the far left in this photo
Flying Spitfire ML295
By 2nd June 1944, when Tommy flew Spitfire ML295, he had already spent 302 hours flying Spitfires, with 113.5 hours of those being operational.
We have already heard about the first mission flown in ML295 previously, however Tommy adds his own notes on the sortie. During the Ramrod mission he noticed a car on the road and turned Spitfire ML295 into a deep dive. Lining up his gun sights and opening fire with the aircraft’s two 20mm Hispano cannons, Tommy’s aim was true and the car disappeared in a cloud of dust and smoke.
“Shot up a staff car near Amiens” Tommy wrote in his logbook. On its first operational mission, ML295 had not just shown itself to be an exceptional aircraft, but had perhaps, also taken its first blood.

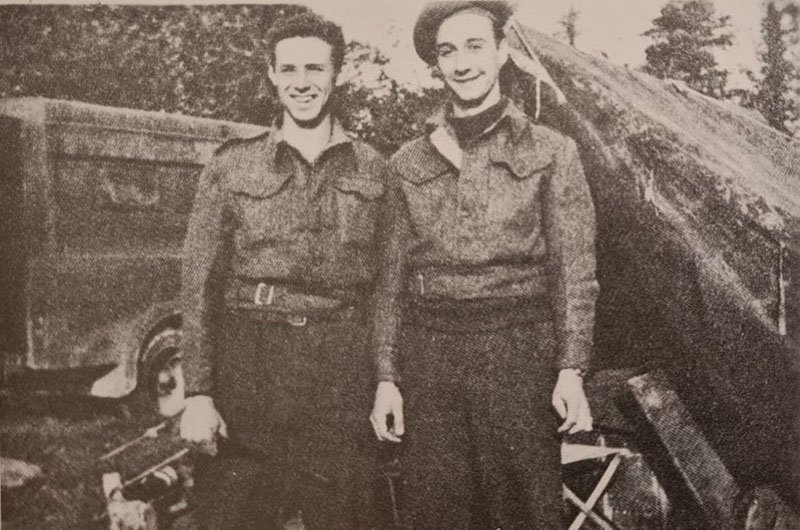
Tommy with some of the other 411 Squadron “Roaring Boys”
Tommy’s Last Mission
On 7th August 1944, Tommy took to the skies again as he had done hundreds of times before. Little did he know that this mission was to be his last as a Spitfire pilot.
Taking part in an Armed Reconnaissance mission over L’Aigle, Bernay and Liseux in Northern France, Tommy took off at 4.30pm.
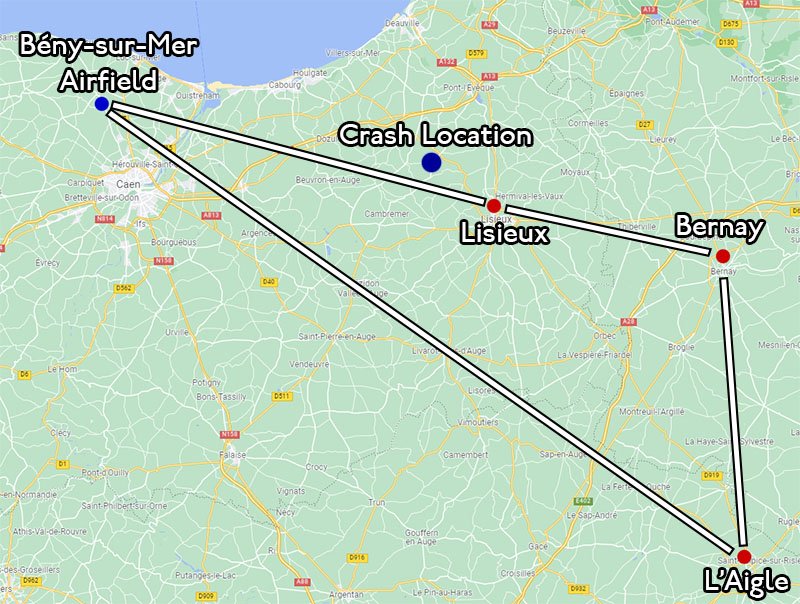
The original flight plan for Tommy’s final sortie was to take them over the German held Northern French towns of Lisieux, Bernay and L’Aigle, before heading back to the Squadron’s base at Bény-sur-Mer
After having successfully spotted and destroyed three trucks, he found that he had been hit in the radiator by anti-aircraft flak. The radiator was the Spitfire’s weak point and was the same damage that had downed ML295 just a week earlier.
After gaining some altitude, Tommy pulled back the canopy of his Spitfire and jumped out. His wingmen saw Tommy’s parachute open and he was seen to land safely in an orchard.
What follows next is from Tommy’s accounts, collated from his official interview taken as soon as he returned to Allied lines and also from the details he revealed over the many times the story has been recounted since.
Up to this point Tommy had flown a total of 390 hours in his Spitfires, 200 hours of which were operational. He had flown 140 sorties.
The incredible story of Tommy Wheler’s time behind enemy lines became known as “Wheler’s Walk”.
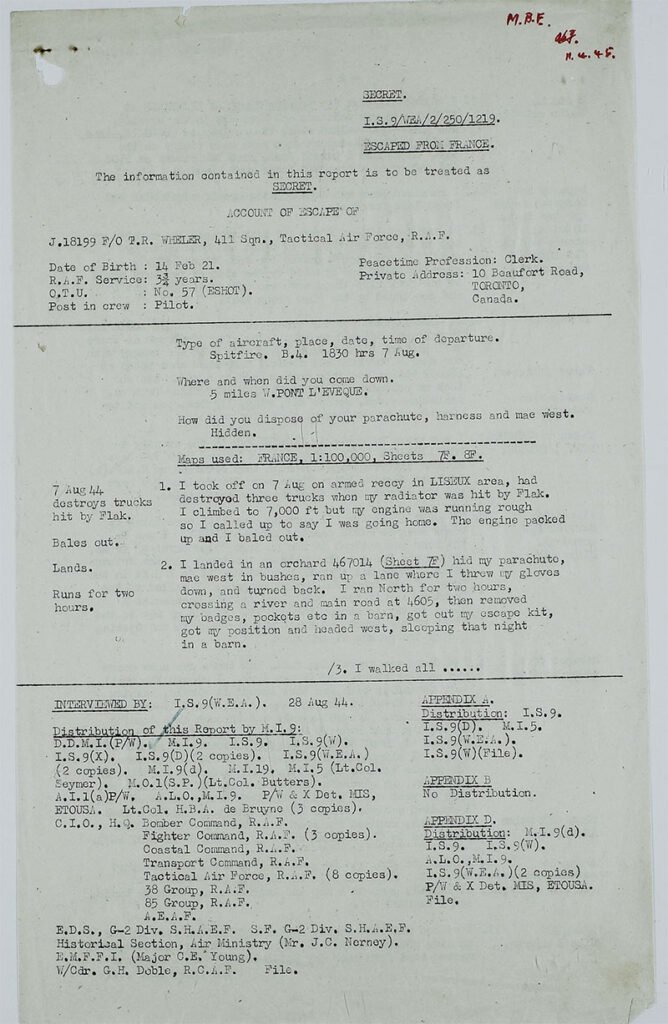
A copy of the report given by Tommy to Intelligence Service 9 (IS9) immediately after his rescue. The long distribution list at the bottom is testament to the importance of Tommy’s heroic escape
Wheler’s Walk
After landing in his parachute, Tommy quickly took note of his surroundings. He removed his parachute and hid it as best as he could. He knew that the orchard he had landed in would soon be teeming with German soldiers, who would have followed his parachute down. Thinking quickly, he ran up a road in the wrong direction and threw down his gloves. He then made a light-footed getaway in a northerly direction. He would need to try and head back towards the Allied lines and somehow make it past the German front lines to safety.
After running for a couple of hours, he found a farm with an empty barn where he spent the night. He removed all of his badges and other forms of identification before continuing on his journey,
Over the next four days, he walked for dozens of miles and swam across two rivers, often having to quickly take cover when a patrol came past.
Luckily, he managed to find some vegetables in a field, along with catching some frogs from a pond. He was able to also make a Horlicks drink from one of his emergency rations. Being now relatively well rested and fed, he continued on his journey.
Taken Prisoner
Continuing through some marshes and past more guards for another day and night, he took cover from the Allied artillery in some woods. Here he was spotted and taken prisoner by some Germans who were manning a radar station. After taking all his possessions, they gave Tommy some food, before taking him to a prisoner of war camp.
After two nights in the camp, he was put in a truck, where he, along with some other prisoners, was due to be taken to Paris for interrogation. Tommy noticed a tiny window in the truck, that kept banging open and closed. He made his way over to the window and keeping his eyes on the guards, eased himself through the small opening. Holding on between the cabin and the trailer, he waited until the truck stopped before jumping off and rolling between the wheels. A flare was lighting the night sky and so Tommy waited for it to die out before crawling over to a ditch and making a run for it.
He walked all night until he met with a local French farmer. The farmer gave him some food and a bed, and let Tommy know that the British front line had advanced to St Pierre, about 10 miles to the West. He handed him a map and a leather coat and Tommy was off again.
Saboteur
Following the map, Tommy walked for two days, travelling at night and resting during the day. During this time, he came across some rail wagons on top of a small slope. Deciding they were worth sabotaging, he disconnected some of the wagons and pushed them down the slope, where they derailed around a corner.
The following night, while in some woods, Tommy saw a brilliant flash of light and a loud roar in the distance. He approached the area and realised he had found a V1 rocket launching site. Waiting until it was quiet, Tommy made his way around the site and cut every wire, cable and hose that he could find, putting the facility out of action.
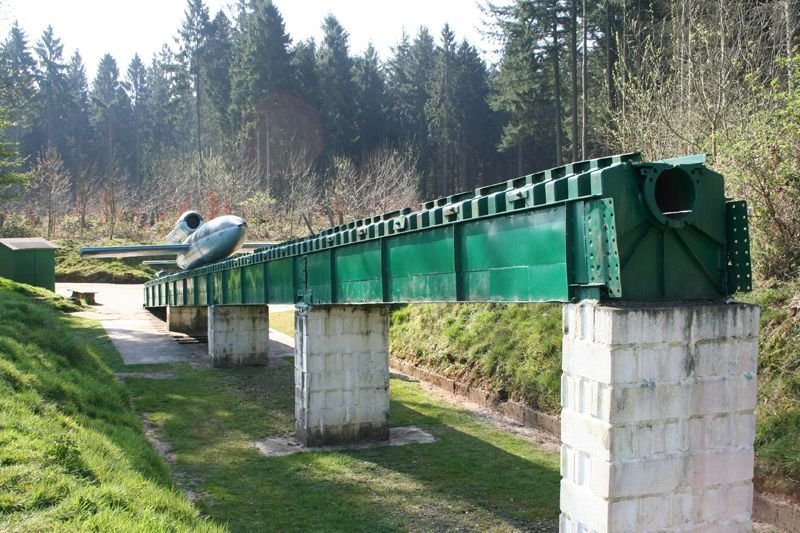
A reconstruction of a V1 launch site. The rocket, an early form of cruise missile, was fired from a ramp, aided by a steam powered catapult. Over 30,000 V1 rockets were produced during the war, with cities in England being the primary targets.
Although fast fighters could shoot at or tip the wings of a V1 in flight, the V1 rocket cost 20 times less than the later V2 rocket, and incredible expense and efforts were made to combat them. It proved to be the only of Hitler’s Wunderwaffe “wonder weapons” that enjoyed cost-effective success
Such actions put Tommy in incredible danger, as orders directly from Hitler had proclaimed that all soldiers undertaking commando/saboteur actions were to be shot immediately upon capture.
Captured Again
Finally he reached the outskirts of St. Pierre and could hear the sound of sustained machine gun fire close by. He knew the British must be nearby, but with so many Germans still in the area, he decided to wait in safety until there was a good opportunity to try and join up with the British.
As the morning arrived, some British tanks rolled past Tommy and so he rose to his feet and stood waiting to hail down the next convoy to pass him. As he stood waiting, two Germans came up behind Tommy and took him prisoner. Fortunately for Tommy, the Germans didn’t know who they had caught.
The Long March
Tommy was marched back to a farm and joined a group of German soldiers that were withdrawing from the area. They took Tommy and marched him day and night to another group of prisoners of war, where an English-speaking interrogator tried to get some information from Tommy – which he refused. He was then taken with the other prisoners in a truck, where they were made to stand up for the entire journey. In the hot French summer heat, many of the prisoners began to faint from heat exhaustion.
One of the German soldiers wanted to paint the top of their truck with a white cross, to denote that they were carrying prisoners. Tommy pleaded with them to not do this, as he knew of no such marking and said that instead it would be like painting a bullseye on the truck and make it an easy target for Allied aircraft patrolling the area. Thankfully they listened to Tommy and the prisoners were instead forced to march on foot for two days.
Tommy’s Final Escape
On the second day, the prisoners, who numbered around 25, were being marched with a file of German soldiers on each side of them. As night fell, Tommy struck up a conversation with one of the guards to his side and dropped back in the group with him. He then hurried back into the group, but rather than joining the prisoners he instead joined the file of guards. With the night pitch black and presumably also being exhausted the guards in front and behind him believed him to be another German guard. Waiting for the right moment, Tommy slipped out of the line and off the road.
After waiting for the group to pass, he made his way east for a few miles before finding a barn where he rested for the night.
In the morning the owners of the barn found Tommy and gave him some food, before taking him to another farm where he remained for 3 days. Finally the British advanced the front line through the area and he was rescued.
When Tommy safely returned to his Squadron on 28th August 1944, he met with Hal Kramer who had also just returned from evading capture after having been shot down while flying Spitfire ML295. Tommy had flown ML295 on its first mission and Hal had flown her on its last, making their reunion a happy end to the story of the Spitfire
In total, Wheler’s Walk had been a journey of 112 miles (180 kms) across heavily defended areas, where Tommy faced the constant threat of death from both German soldiers and Allied air attacks and artillery. Despite being tired and hungry, he showed incredible fortitude and resourcefulness and his acts of sabotage had perhaps saved dozens of lives.
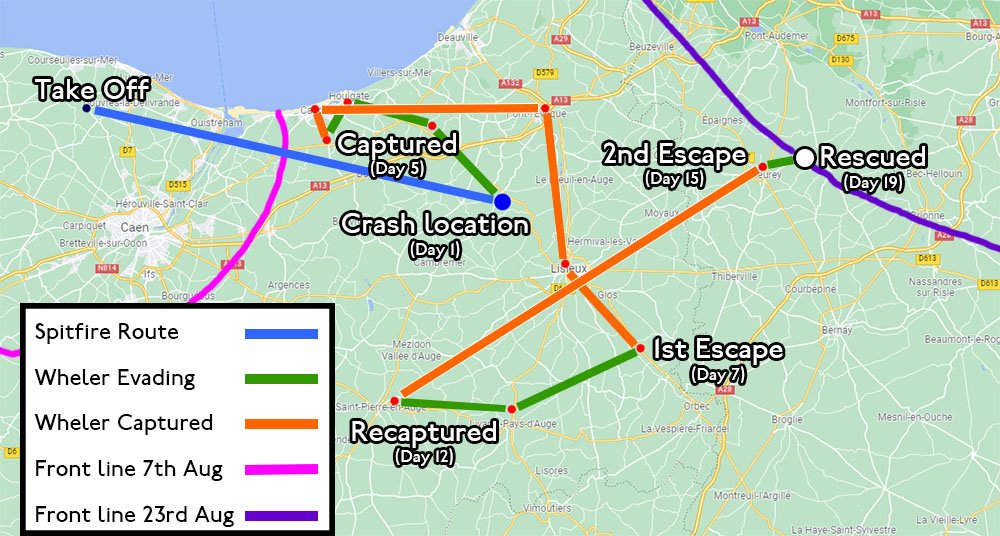
Tommy Wheler gave a very accurate account of his time behind enemy lines and so we can plot his journey. He was shot down not long into his original mission (blue), before beginning the first part of his walk (green). When he was captured, the front lines, and safety, would have been just a few miles away (pink). The route taken while captured (orange), shows his route to his initial interrogation and subsequent travel as he was being taken to Paris. His escape across country (green) would have eventually brought him, again, within just a mile or two of the front lines. By the time of his second escape, the Allied advance was just behind him (purple), meaning he did not need to wait too long for his rescue.
After the War
Tommy was awarded the Distinguished Flying Cross (DFC) on 8th December 1944. The next year on 14th September 1945 he was made an MBE (Member of the Order of the British Empire).
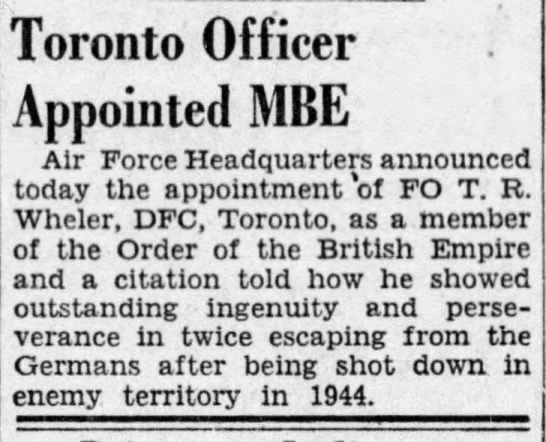
A clipping from the Ottawa Citizen announcing Tommy’s MBE award
Following the end of the war and Tommy’s return to Canada, he had a brief pause from flying; instead working for his father-in-law.
However, the skies soon called to him again, and when the 411 Squadron reformed on 1st October 1950, Tommy Wheler was asked to represent all the wartime pilots in the ceremony. The Squadron was equipped with the latest jet fighter, the De Havilland Vampire.
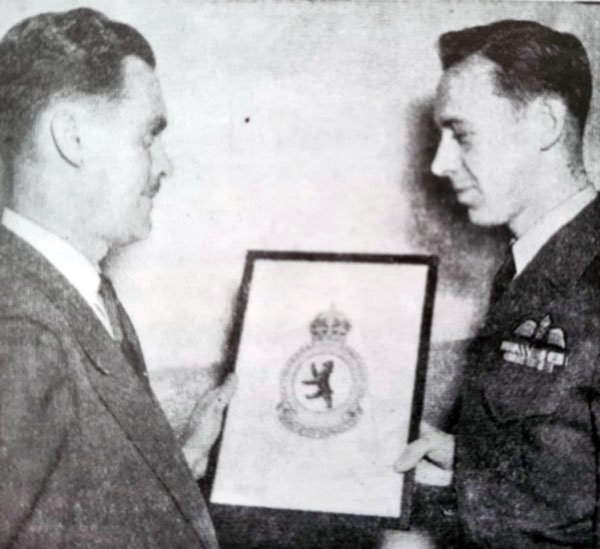
Tommy (right) in 1950 at the reformation ceremony of 411 Squadron
Tommy later worked as a Regular Support Officer for 400 Squadron, before moving to West Germany with 444 Squadron. Here Tommy flew the Canadair Sabre, which was a Canadian variant of the F-86 Sabre built under licence.
While he was in Germany, Tommy took the time to visit the family that had helped him in France during the final part of his escape journey.
In 1968, Tommy retired from the RCAF, having reached the rank of Lieutenant Colonel.
He remained active in his retirement, keeping his quick wit and sense of humour. Tommy Wheler finally passed away on 12th October 2018 aged 97, the last of the Roaring Boys.
Spitfire Elizabeth and the Roaring Boys
If you are interested in learning more about another of 411 Squadron’s Spitfires and her pilots, including Tommy Wheler, then I would recommend the book Spitfire Elizabeth and the Roaring Boys.
The author, Nick Oram, has been very kind and helpful at pointing me in the right direction during my research, and the book has been a great resource for many of the details of Tommy Wheler you’ve read in this article: https://www.amazon.co.uk/Spitfire-Elizabeth-Roaring-Boys-Nick/dp/1786235285
Next Sortie
We will take a look at another of Spitfire ML295’s pilots, Bob Cooke. Despite being 6’4″ tall and barely fitting inside a Spitfire, he went on to become one of 411 Squadron’s most talented and daring pilots, and took his first aerial victory in ML295.
See you there.
https://www.great-british-watch.co.uk/sortie-16-robert-cooke/


Sortie 14 – The Spitfire’s Squadron – Great British Watch Company
26 July, 2022 at 7:01 pm
[…] Sortie 15 – Tommy Wheler DFC Post navigation ← Previous PostNext Post → […]
Amy Wheler
21 November, 2023 at 1:10 am
Thank you for taking the time to tell these stories of my Papa. Amy Wheler, proud granddaughter
Colin
4 December, 2023 at 4:37 pm
Thanks Amy! It was a real privilege to research and write about your Papa and his incredible achievements. Colin